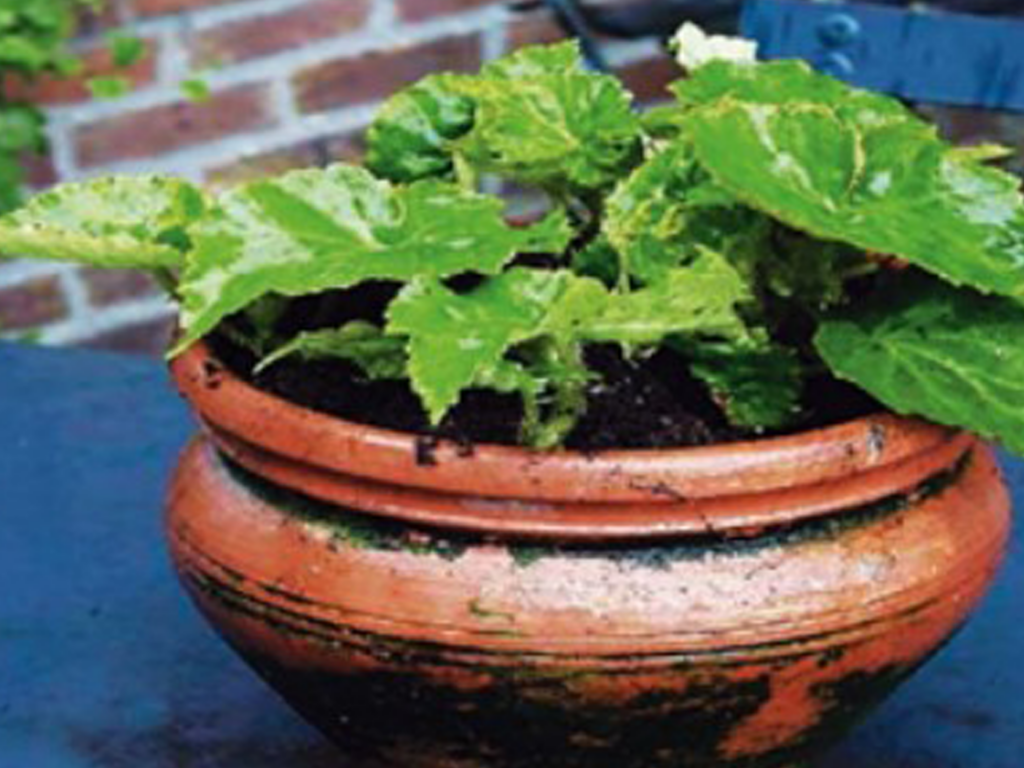
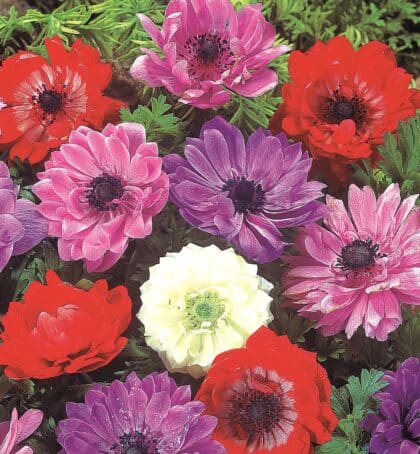
Growing Begonias
GROWING BEGONIAS
Begonias are one of the most useful summer flowering plants. They can be used in beds, containers and hanging baskets. Begonias are easy to care for and will grow even in partial shade.
PLANTING
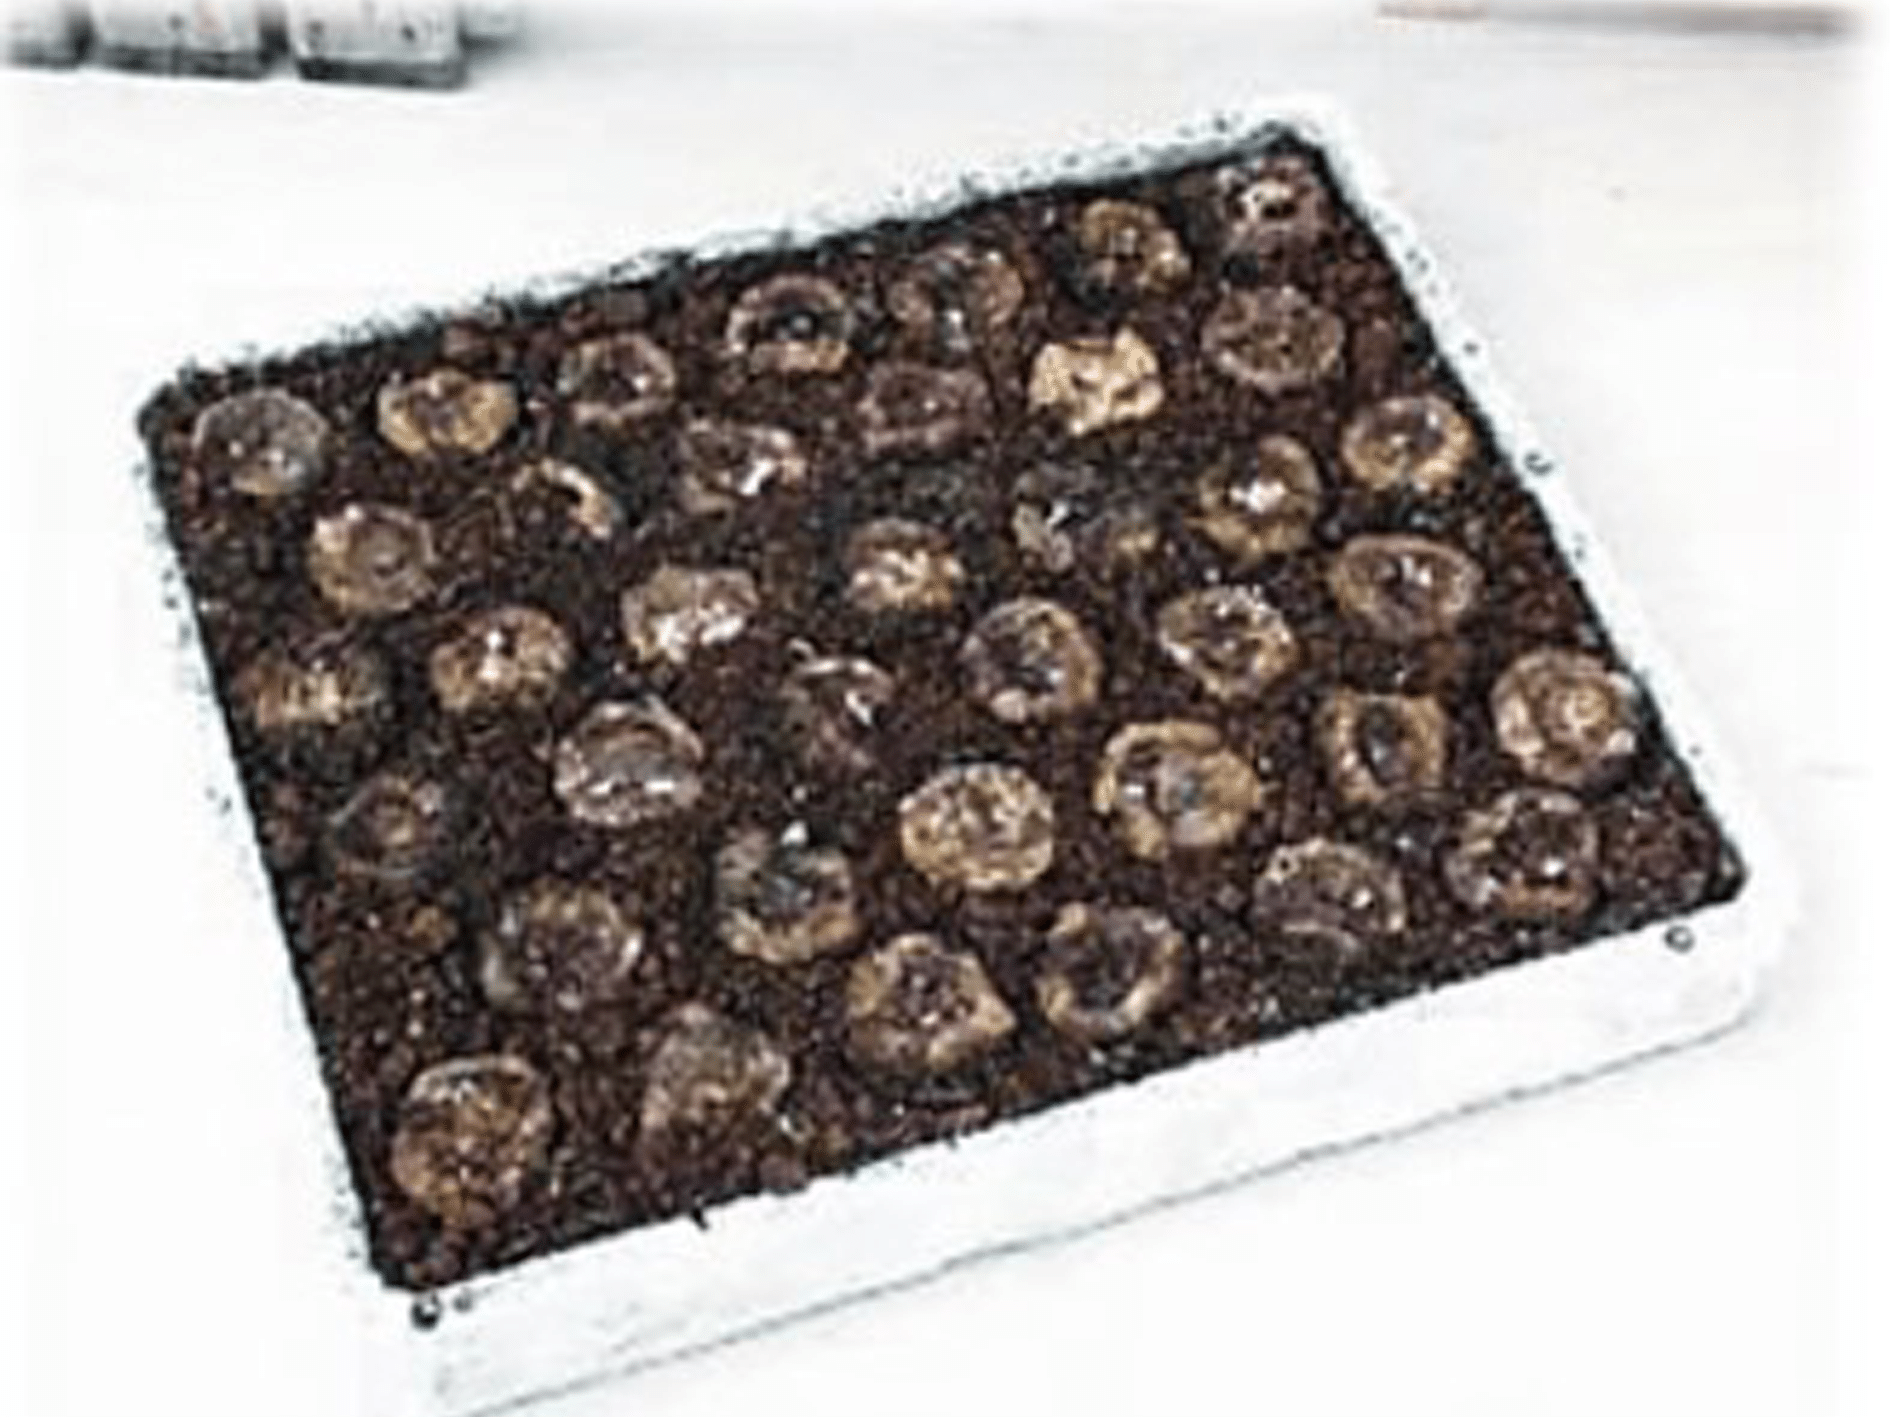
Plant the tubers hollow-side up in moist compost. For outdoor cultivation, start in an unheated greenhouse or cold frame from early April.
Cover with a shallow layer of compost and water sparingly until growth begins. Depending on when you start the begonias, this can take up to 6 weeks. At this stage we are trying to achieve maximum root growth until shoots appear.
The corms should be exposed to maximum daylight but make sure they are protected from the harshest mid-day sun.
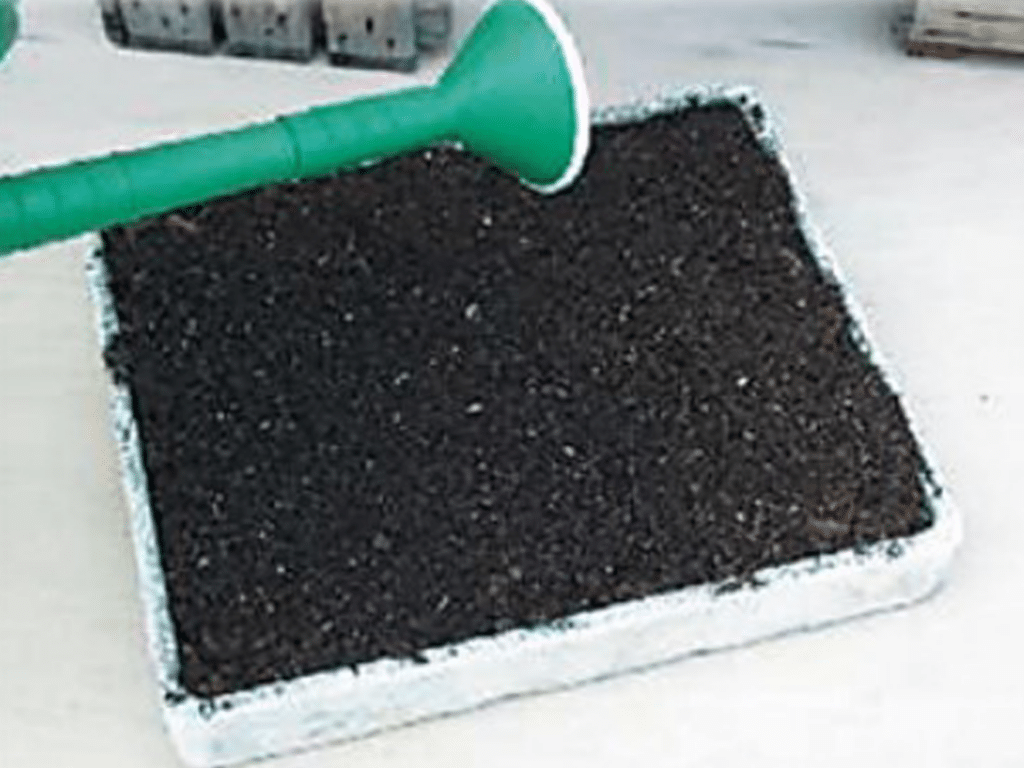
Water regularly (but be sure not to over-water, the compost should not become sodden.) It is important that the compost does not dry out. You can start hardening the plants from mid-May.
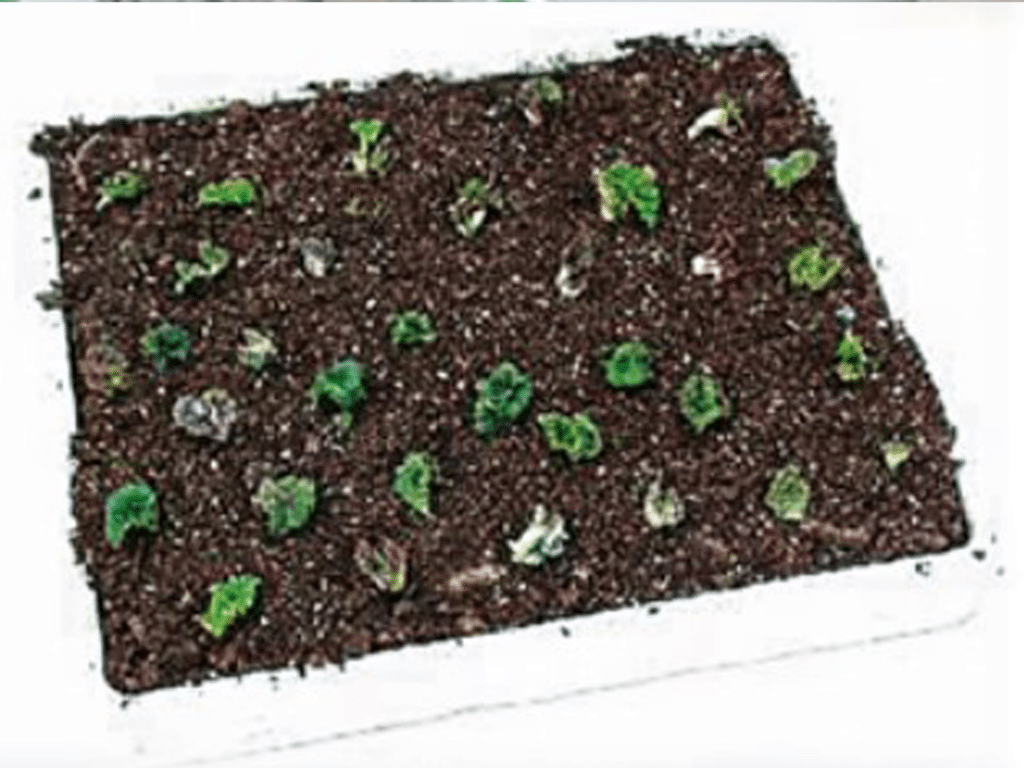
When the top growth is about 2 inches (4-6cm), the plants can be potted on.
Apply a tomato plant feed once every two weeks. During flowering, deadhead weekly.
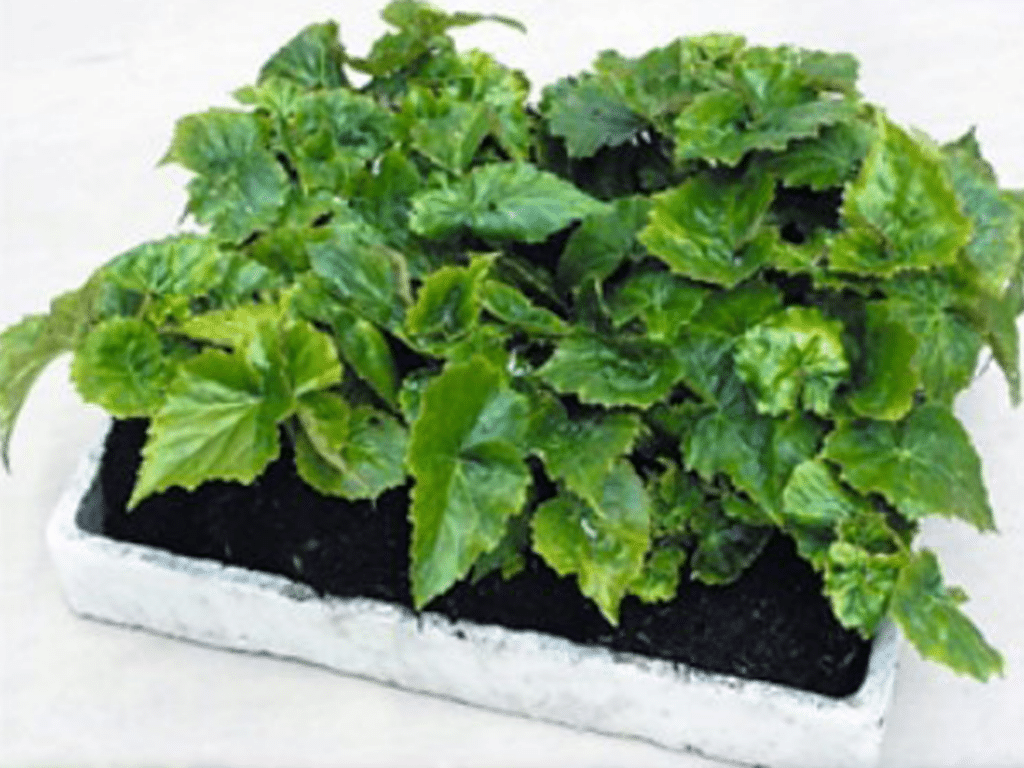
Begonias will flourish in partial shade and cool, moist conditions.
WINTER STORAGE
As begonias are not tolerant of frost, it is essential to lift and store them over winter. Cut the foliage down to ground level and carefully lift the plants out of the soil. Leave to dry and trim off any fine roots.
Store tubers in trays or wooden crates, packed with dry sand or peat-free compost. Store in a cool dry place and protect from frost.
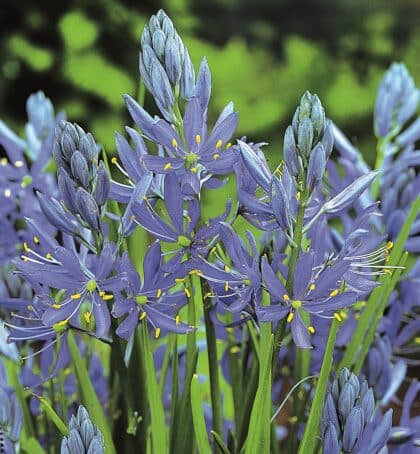
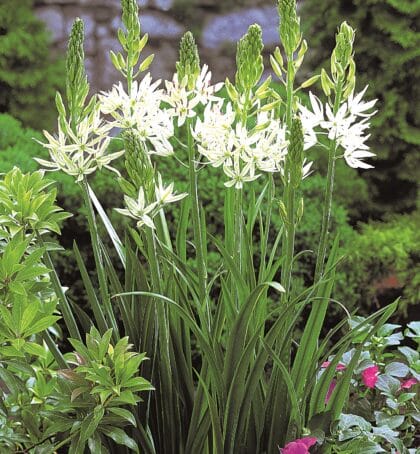
Camassia
Beautiful Camassia

Discover the hidden charm of Camassia bulbs, an excellent addition to any British garden. Known for their splendid beauty and versatility, these bulbs will give your garden a captivating landscape that’s truly a feast for the eyes.
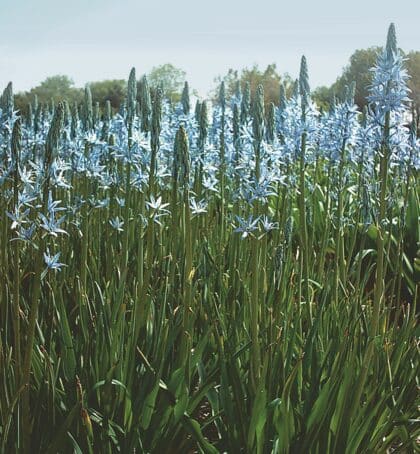
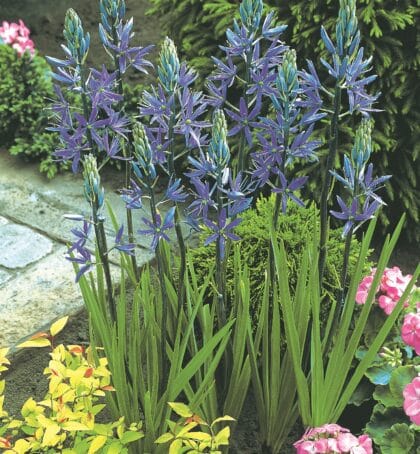
Camassia leichtlinii
The Great Camas, scientifically known as Camassia leichtlinii, are a garden showstopper. Towering at 90 to 120 centimetres, this species showcases sturdy flower spikes adorned with numerous star-shaped blossoms in enchanting shades of blue or white. These late spring bloomers, perfect for the British climate, attract a variety of pollinators and their adaptability to diverse soil types makes them a must-have for any garden. Add them to your landscape for a touch of native elegance.
The Versatile Camassia esculenta
Meet the Quamash or Indian hyacinth (Camassia esculenta), a plant that lends a touch of softness to any garden landscape. With its ornamental value, Quamash is a popular choice for British gardeners. Its late spring blooms offer an attractive source of nectar for pollinators, further enhancing its appeal.
Planting and Growing Camassia Bulbs
Camassia bulbs flourish in the British climate and soil:
- Soil type: Camassia bulbs thrive in moist, well-drained soil, from clay to sandy soil types.
- Climate: Robust and adaptable, Camassia bulbs flourish amidst the cool summers and cold winters of the UK.
- Sun exposure: Even under partial shade, Camassia bulbs produce a spectacular bloom, but they shine best under full sun.
- Planting time: Plant your Camassia bulbs in the autumn, between September and November, before the ground freezes.
- Planting depth and spacing: Dig a hole 10 to 15 centimetres deep, plant the bulb with the pointed end facing upwards, and leave around 10 to 15 centimetres between bulbs.
- Watering and maintenance: Keep the soil evenly moist during the growing season, but avoid waterlogging to prevent bulb rot.
- Pollinator friendly gardens: Camassia flowers attract an array of pollinators, making them an excellent addition to bee-friendly gardens.
- Wildflower meadows: With their ability to form colonies, Camassia bulbs are perfect for wildflower meadows or naturalistic landscapes.
Although resilient, protect your bulbs from slugs and snails when young shoots emerge in spring.
Shop our Camassia bulbs
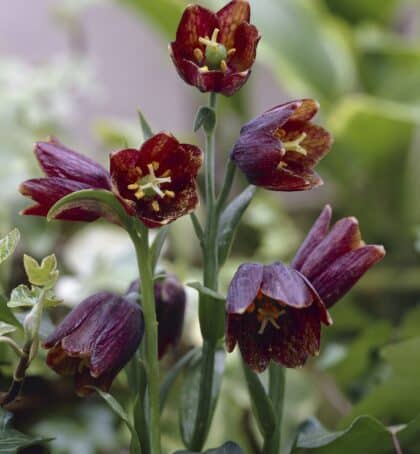
Planting Guide: Fritillaria
Planting Guide: Fritillaria
Unique, emblematic and often unusually coloured, fritillaria are beautiful and rewarding plants to grow. They love the light shade of woodland conditions and can be stunning in pots.
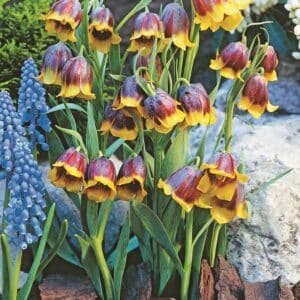
Fritillaria Imperialis – Crown Imperials
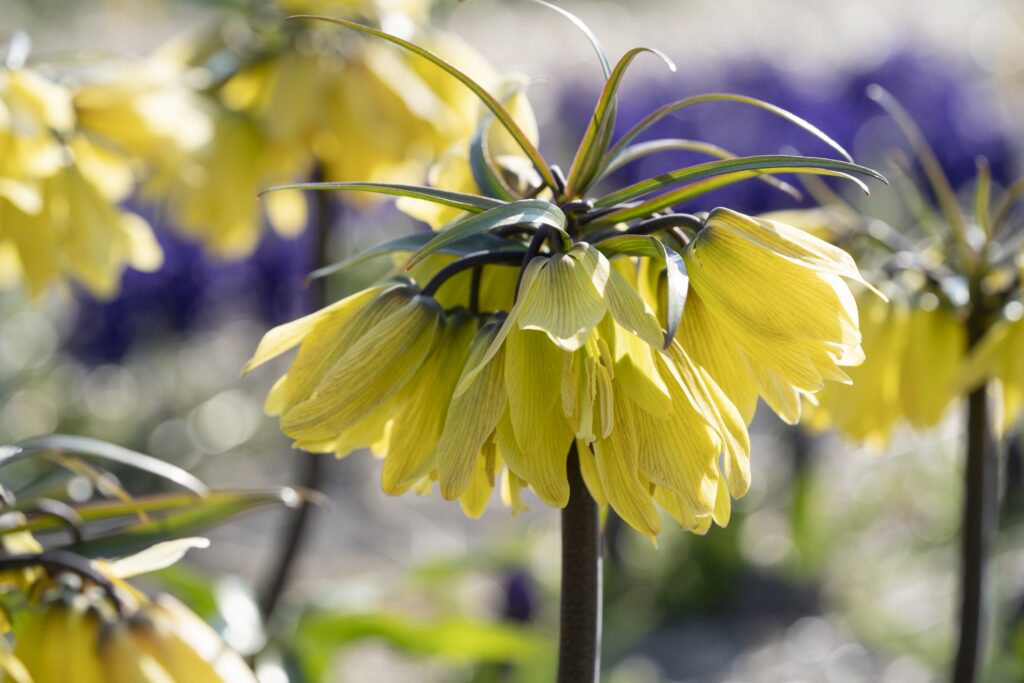
For best performance plant bulbs deep, an absolute minimum of 15cm/6″, and similarly spaced apart. This is to account for their deep root system. Plant in a well-drained, loamy soil in a sunny open position where they can be left undisturbed to naturalise.
To encourage flowering in following years and in areas where the soil conditions are poorer apply a dressing of sulphate of potash in the spring once there is sign of growth and again in late autumn while the plant is active. This is to help toughen the plant, aiding its resistance to pests, disease, drought and extremely cold temperatures.
We recommend planting the bulbs on their side or at an angle. This is because new shoots develop from the indentation and this will reduce the chance of water gathering and rotting the bulb while it is dormant in the summer.
If conditions are suitable Crown Imperials will form clumps which over time may become congested and start performing poorly. They may be split but no later than August while the plant is still dormant and root activity hasn’t began. Once transplanted it may take the bulbs a season to return to their prior performance.
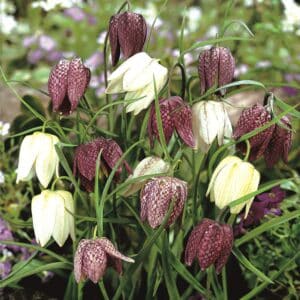
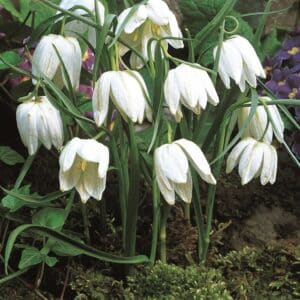
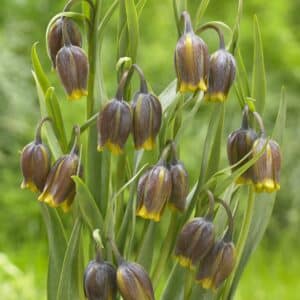
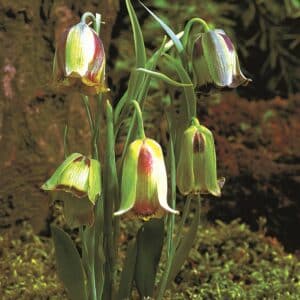

Fritillaria meleagris

Commonly known as the snake’s head fritillaria, these very popular bell shaped flowers have naturalised well in the United Kingdom though their is historical debate as to whether they are native or came over from Europe or Western Asia as a garden plant which escaped.
melagris prefer cooler and more moist positions in the summer compared to the imperialis cultivars and other species varieties such as persica and can be found naturally on flood plains, river meadows and grasslands. They are also easily grown in pots so are a valuable additions to all gardens and planting schemes.
Plant the bulbs around 3 times the size of the bulb deep with similar spacing apart to ensure the best results.

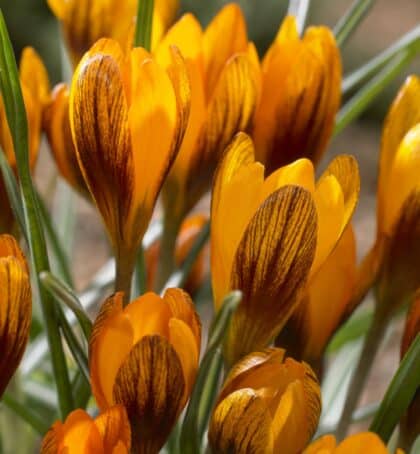

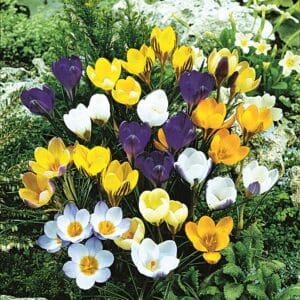
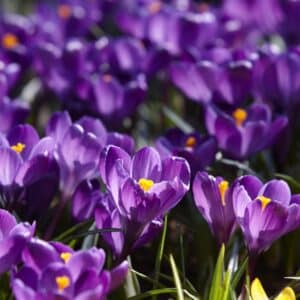
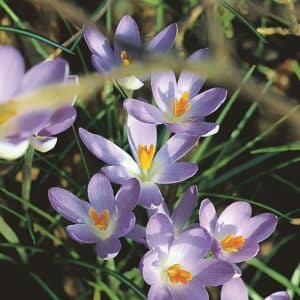
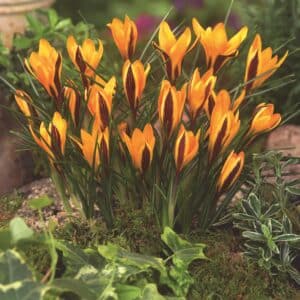
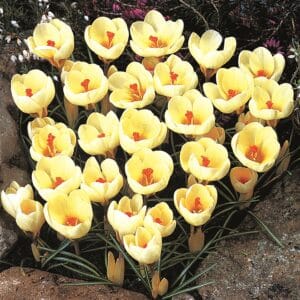
Growing Crocus
Growing Crocus
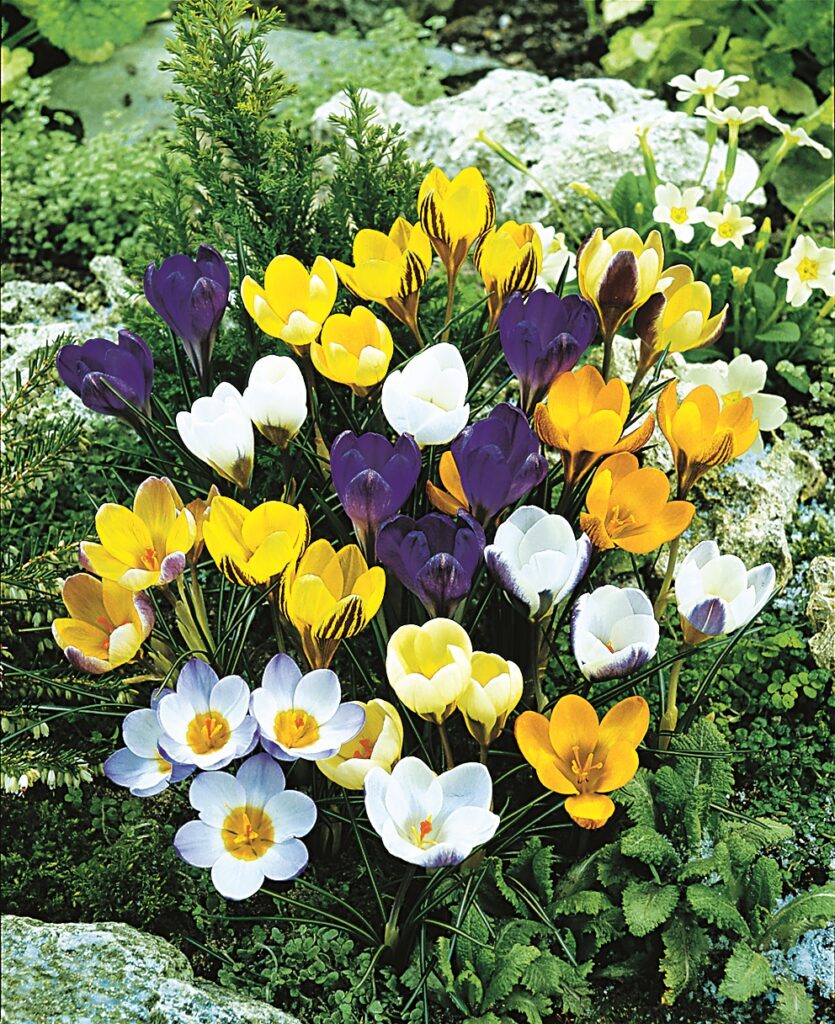
Crocus will thrive in good ordinary garden soil and can be used anywhere if the sun can reach them. The flowers will remain closed during bad weather and at night. This help protect their nectar for visiting bees and butterflies on sunny days. If left undisturbed they increase readily from self-sown seed and naturalise well.
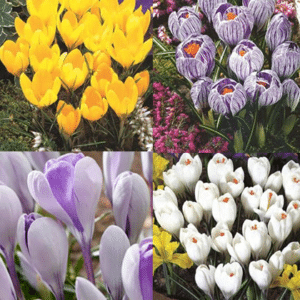
Planting Instructions
Plant our winter flowering crocus between 5-10cm (2-4″) deep as they are particularly suitable for the rock garden or small containers and if left undisturbed they will naturalise. Varieties such as the cultivars tommasinianus and chrysanthus work well in small groups in areas with short grass, under deciduous trees and low maintenance borders on in the top layer of containers in containers or courtyard gardens.
The larger flowering crocus do have an advantage in grass and in woodlands thanks to their bigger bulbs. These are grown from selected stocks, producing very large flowers. In lawns, the large flowering varieties can be planted a bit deeper and should be spaced a little further apart, around 7-10cm (3-4″).
Our Bulbs
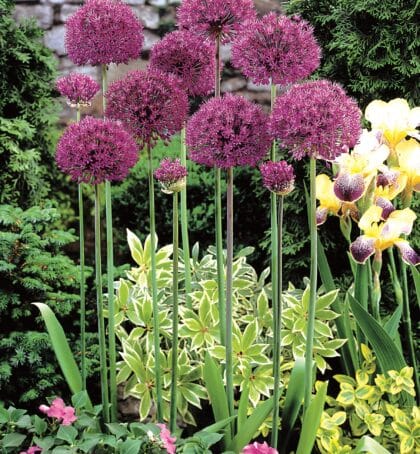
All About Alliums
All About Alliums
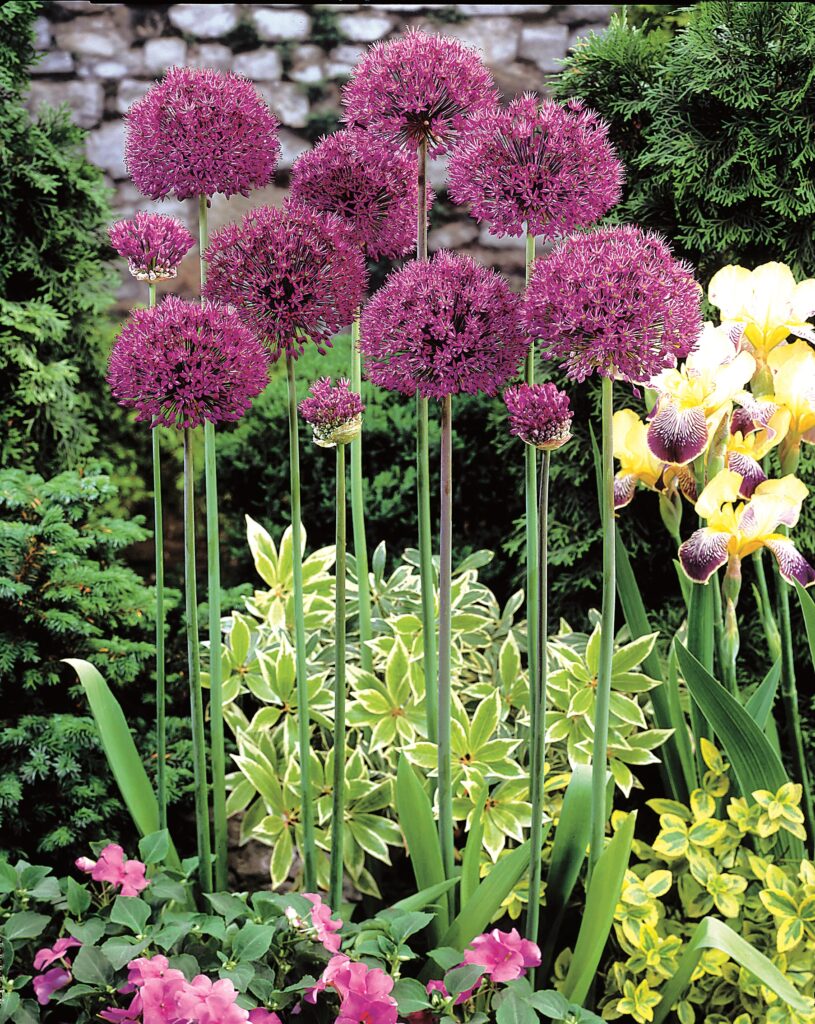
These ornamental onions will thrive anywhere and will live for many years. Their richly coloured ornamental blooms, in a wide range of shapes and heights, are lovely in borders and excellent for naturalising in grass and woodlands. They are also very popular in pots, containers and in floral arrangements because of their lasting qualities. They appear anytime form late spring to early summer.
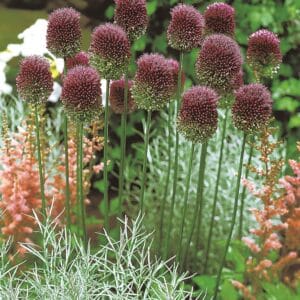
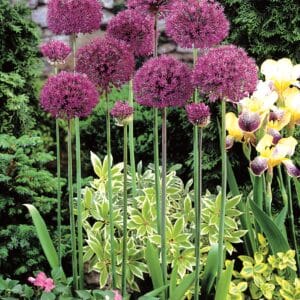


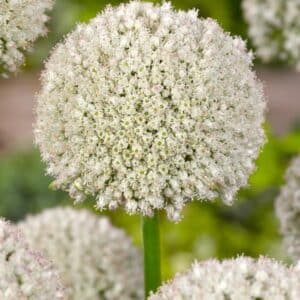
How to grow Alliums
Alliums can grow in most locations, but they prefer a sheltered, sunny and well-drained site. They should be left undisturbed from one year to another and it is not uncommon for seedlings to appear naturally. For individual varieties planting depth please see the product information page, but for a generally aim for around four times the diameter of the bulb. Make sure to leave adequate spacing between bulbs to accommodate the plant’s flower head, for larger varieties such as Globemaster, allow for around 30cm/12″ between bulbs.
Over winter alliums can be left in the ground. Once the stem and foliage have died back and been removed the site should be covered with a good layer of mulch to offer winter protection which should then be removed the following spring to allow new growth to continue.
Our Bulbs
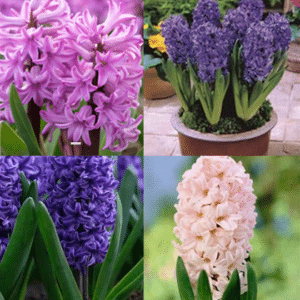
Growing Hyacinths
Growing Hyacinths
Hyacinths are ideal for spring bedding, being relatively short they are perfect for the front of borders and for containers.
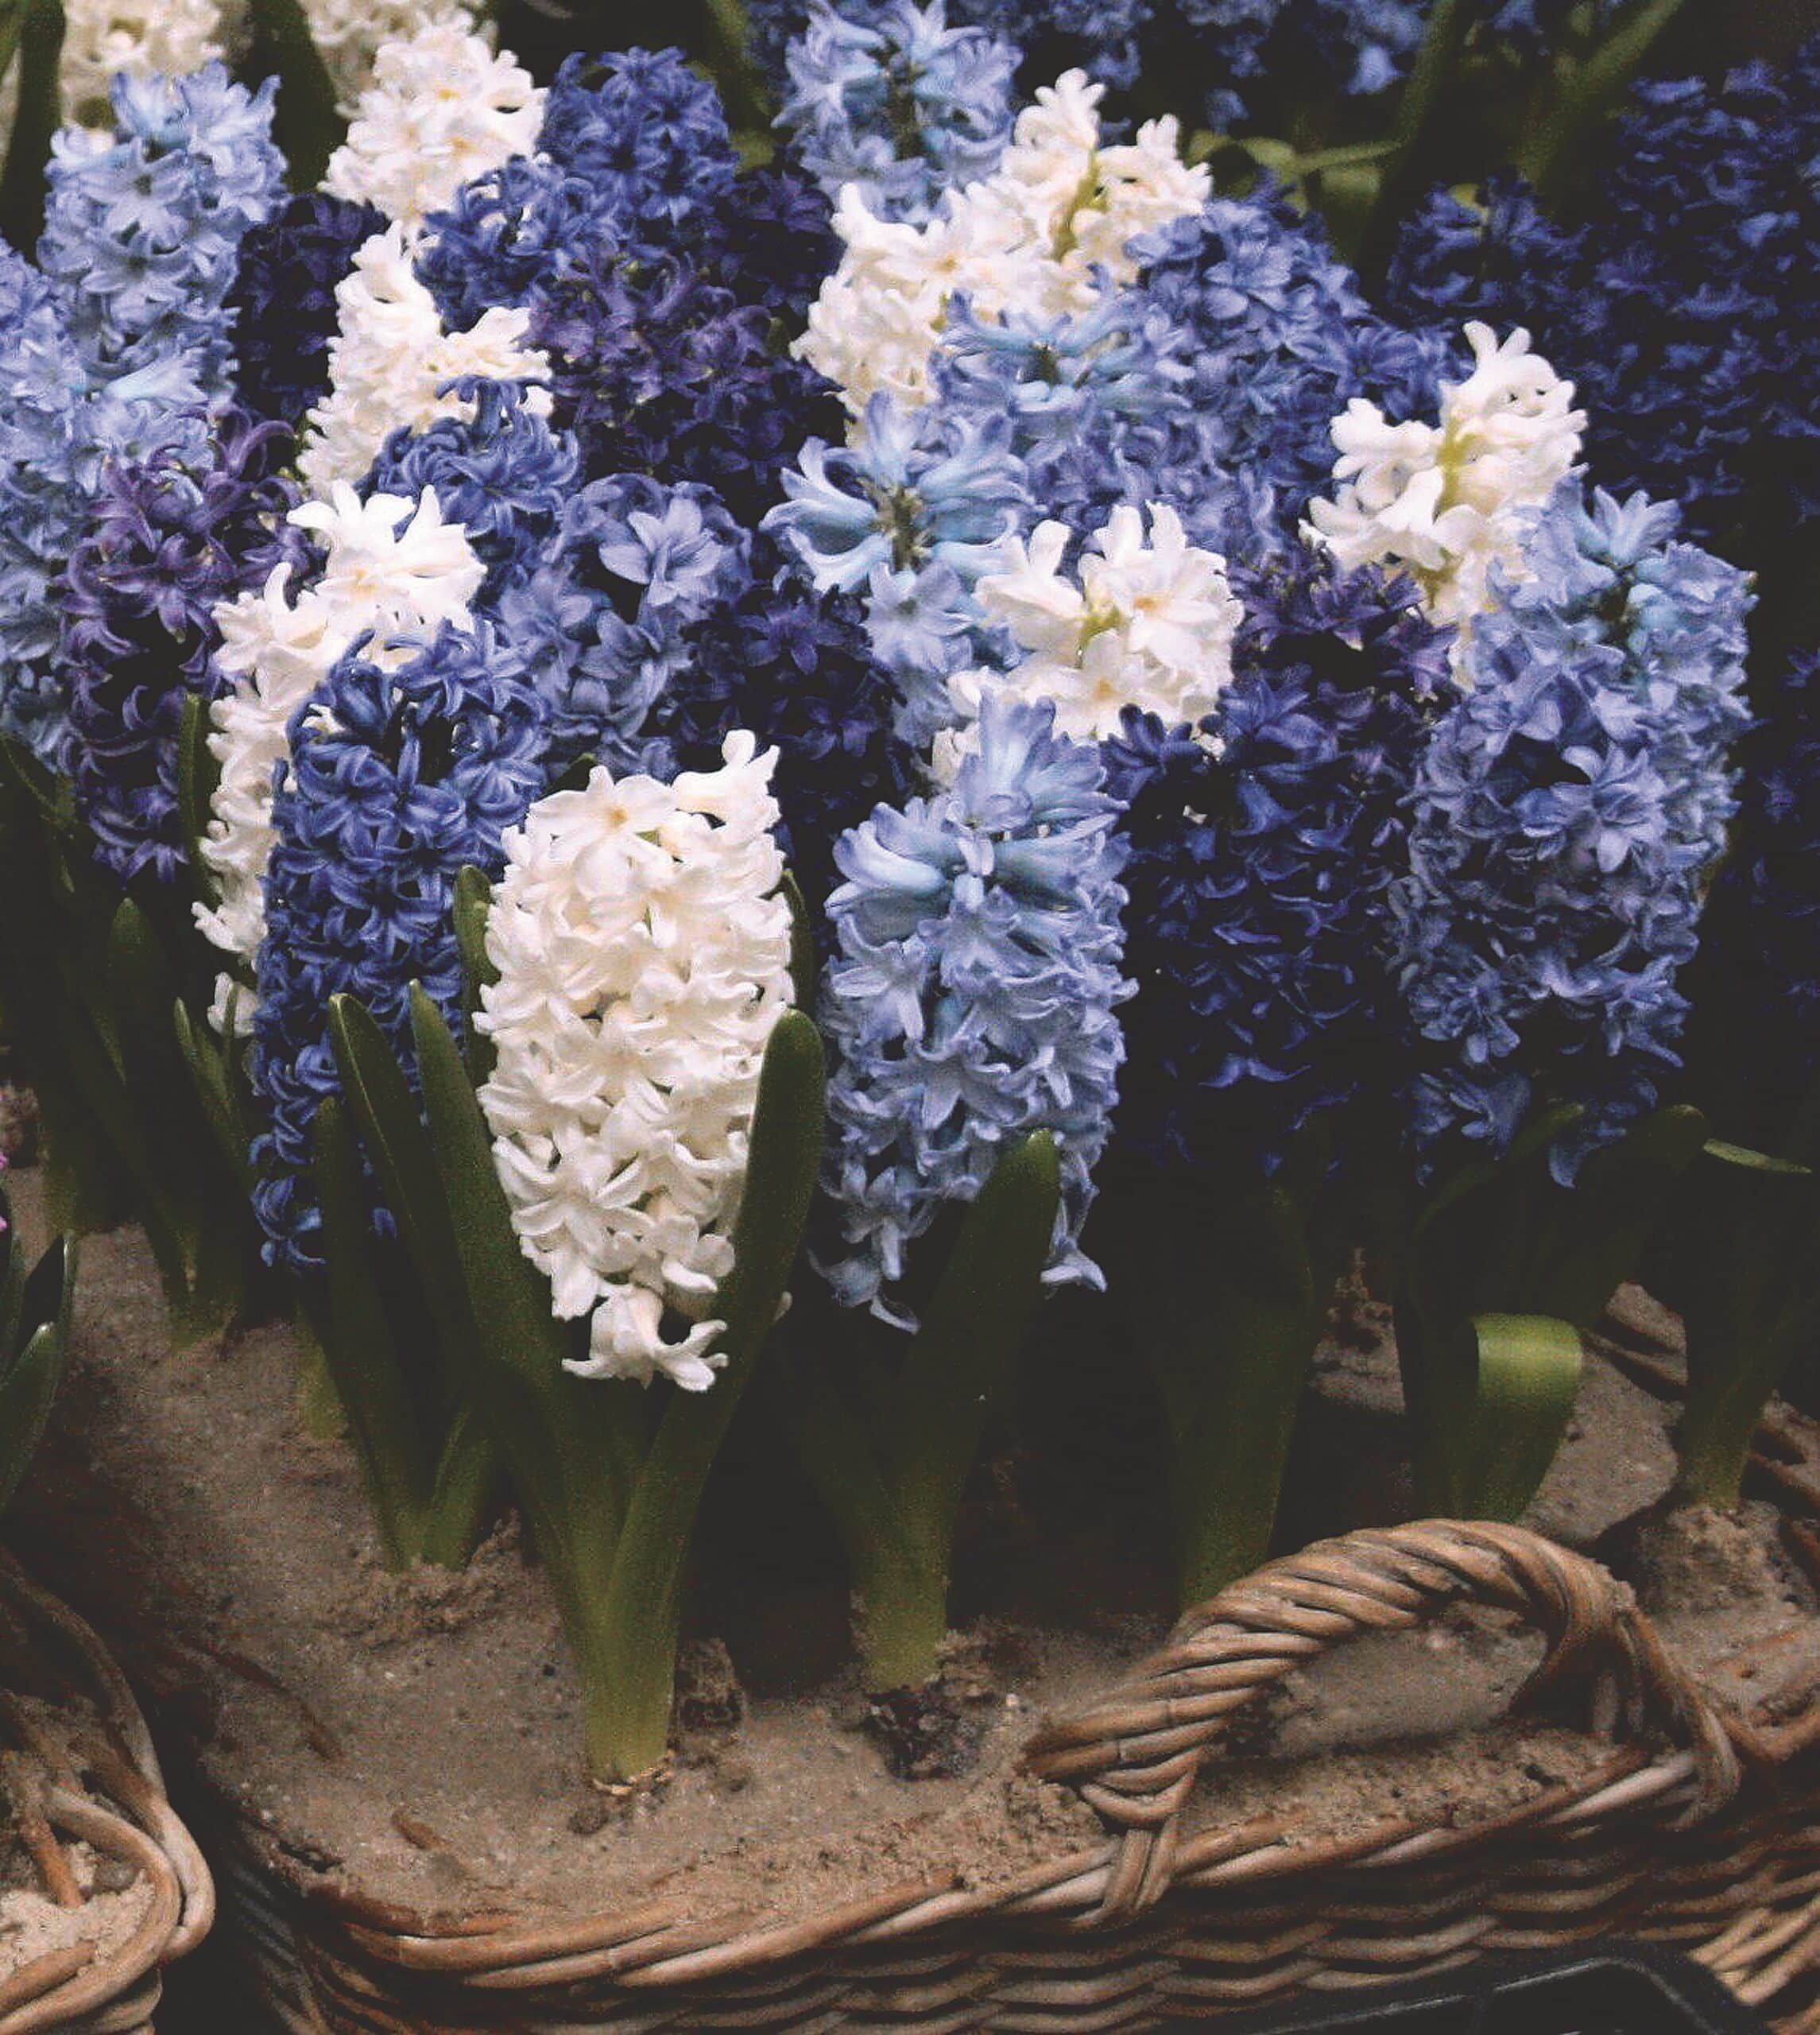
Planting Instructions
Hyacinths can be grown to perfection without any difficulty provided some basic rules are followed. The first essential rule is to develop a good root system as this has to support the plant throughout its life. This is achieved by a cool temperature and even moisture in the early stages after planting.
Hyacinths in Containers and Pots
Hyacinths do equally well planted in pots and containers but it is essential to plant the bulbs in good quality soil. Choose a sunny spot but remember it is essential during dry periods in the growing season that they are sufficiently watered. If not the results will be stunted and shrivelled flower heads.
How to grow Christmas Hyacinths
Specially prepared hyacinth bulbs can be easily forced indoors. These bulbs, with their wonderful scent can fill your home with a bright pop of colour during the holiday season. Christmas flowering Hyacinths should never be purchased before September, as they need to undergo temperature and humidity treatment to allow the flower bud to advance to the levels needed. The process of forcing these bulbs, to guarantee Christmas flowering, is simple provided you follow the instructions below.
- The first job is to prepare your bowl or container by filling to the rim with a good quality bulb fibre. Make sure this is well watered, which will avoid the need to water before bringing indoors at the beginning of December. Hyacinths require a moist soil, as if they become too dry the flower spike will be stunted.
- Bulbs should be planted into the container so that the top quarter is visible above the soil line. Potting should not be too firm, otherwise there is a tendency for the bulbs to push themselves out of the compost as they form their roots.
- The bowls should then be moved into a cold frame or against a north facing sheltered wall and covered with soil. At this stage our only concern is to encourage good root growth which is necessary before any attempt at forcing is made. Alternatively, they can be placed in a dark place such as a cellar or a cupboard but make sure they do not dry out.
- On or around the first of December it is time to begin the slow forcing process. The container of hyacinths should be removed and placed in a dark room with a temperature of approximately 65 degrees Fahrenheit. The bulbs should be left like this until the flower is well out of the neck of bulb. This usually takes 1-2 days.
- The bulbs can then be moved to a sunny position and allowed to flower normally. During this time it is important to ensure that the bulbs receive plenty of moisture.
Our Bulbs
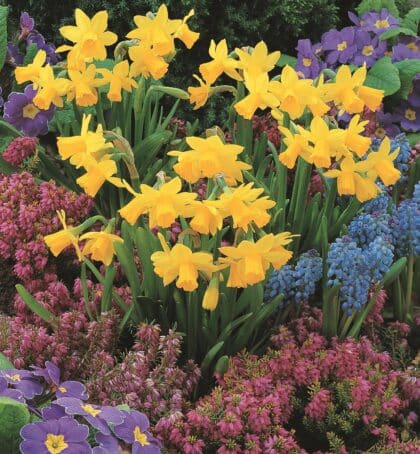
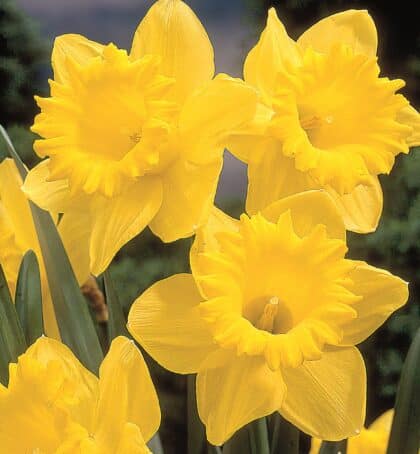
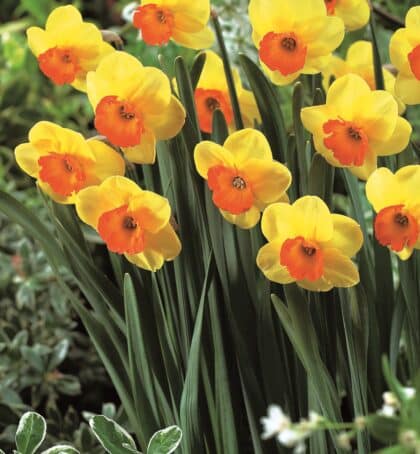
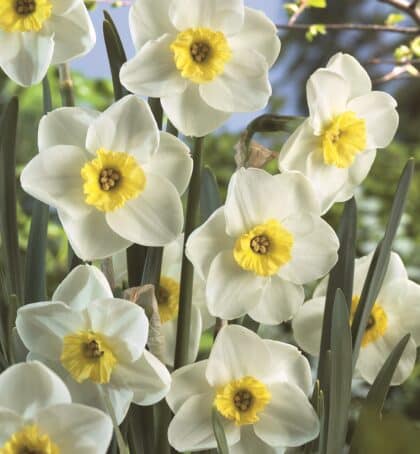
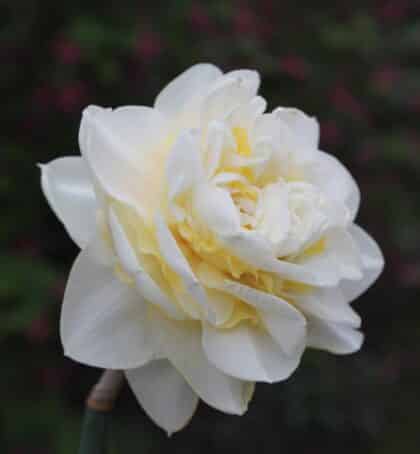
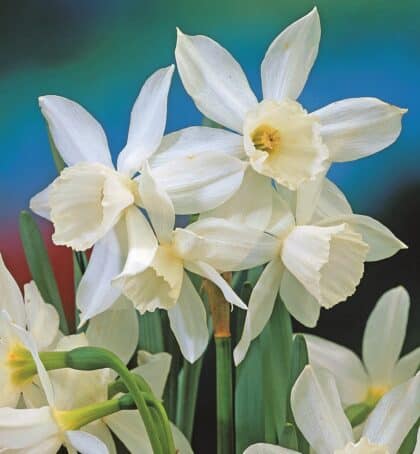
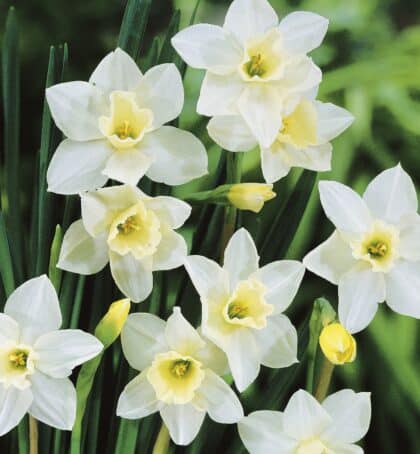
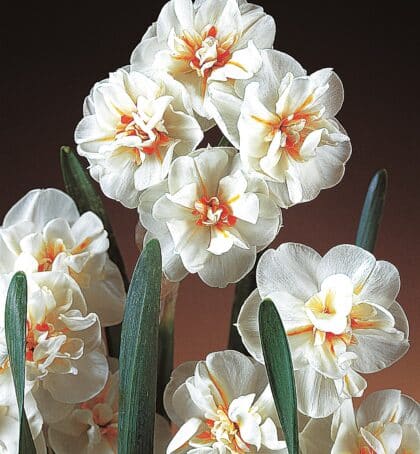
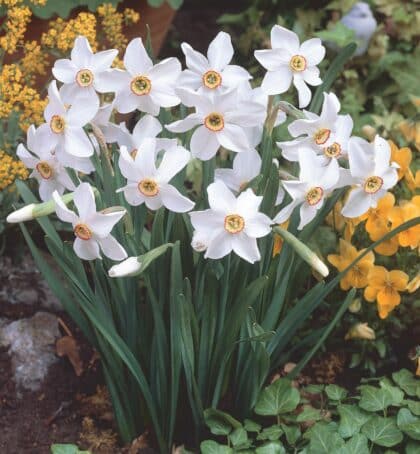
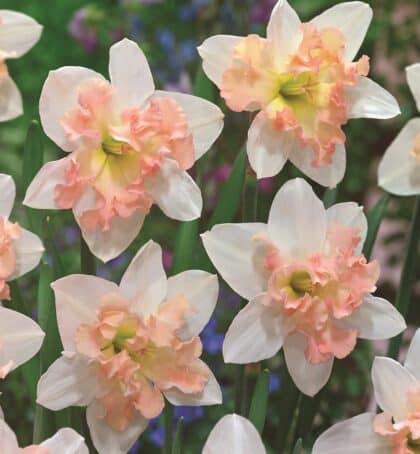
Growing Daffodils
Growing Daffodils
Choosing the Right Daffodils
It can often seem quite daunting to choose just the right plant, given the enormous range from which to choose. Start with the desired position within your garden. Here are some considerations to take into account.
- herbaceous border or shrubbery – to provide a focal point choose from the larger flowering daffodils, typically trumpets (div1), large cupped (div2), small cupped (div3), doubles (div4) and tazetta daffodils (div8).
- mass formal planting – here you can choose from the full spectrum, avoiding the very short varieties, depending on the surrounding planting.
- bulbs for naturalising – particularly suitable are the cyclemineus, triandrus and poeticus daffodils especially if you are planting in grass.
- bulbs for a patio display – unless you have very large containers choose from our dwarf narcissi section. Particularly recommended are the smaller free flowering cyclamineus narcissi.
Daily Telegraph (London)
The late Fred Whitsey posed the conundrum that when buying daffodils, you can pay more than double for what seems to be the same thing. The Daily Telegraph grew samples, in batches of 10, from different sources at different prices. A member of the Royal Horticultural Society’s Narcissus committee assessed the results. Most batches gave at least 10 flowers, but the yield rose to 26 in one case. Some flowers were dismissed as poor while others got a top rating. The plants were also studied for their capacity for increase. This was where the variation showed most.
Some samples could be relied upon the give a 100% more in the following season, others much less. In several of the samples only 1 of the 10 original bulbs would yield another that would flower. “The conundrum was solved. It became a matter of investment. Increase was what counted most. When you plant daffodil bulbs in the autumn, you are not only creating next spring’s flowers but providing for the future. Daffodils should be expected to “multiply”, as gardeners say.”

“The bulbs supplied by Bloms cost the most, gave the most flowers (26), were of top quality and had the potential of doubling themselves next year. The trials indicated that you get what you pay for.”
Planting Instructions
All daffodils are suitable for sunny or semi-shaded positions, although pink cupped varieties are best planted in a sunny aspect to develop their colour. Always plant in well cultivated soil. Plant the bulbs as soon as possible upon arrival; if this is not possible, store in a cool place to allow some ventilation.
Daffodils make an excellent investment as they are ideal for naturalising in the garden. They are best planted where they can be left undisturbed and when allowed to establish will afford much pleasure for many years. Plant 15-20cm (6-8inches) apart.
The secret of success is to plant the bulbs at a sufficient depth to prevent them from ever drying out. Between 12-15cm (5-6inches) of soil on top of the bulb should suffice. The biggest cause of daffodils going blind is shallow planting, which will also cause smaller flowers in future years.
Daffodils look superb in pots and containers on the patio. They should be planted in deep tubs or bowls as soon as possible upon receipt and positioned outside in the garden in a cool spot. Never allow the soil to dry out and ensure regular watering during prolonged dry periods, even in the middle of Winter. Unless you have very large containers choose from our dwarf narcissi section. Particularly recommended are the smaller free flowering cyclamineus narcissi.
After flowering in the Spring, remove the faded flowers and let the foliage die down (this usually takes at least six weeks). Daffodils benefit from regular feeding with a liquid fertiliser after flowering, we recommend intervals of 7-10 days. If your daffodils are grown in the lawn, mow round them and do not cut down until at least 6 weeks after flowering.
BLOMS DAFFODILS


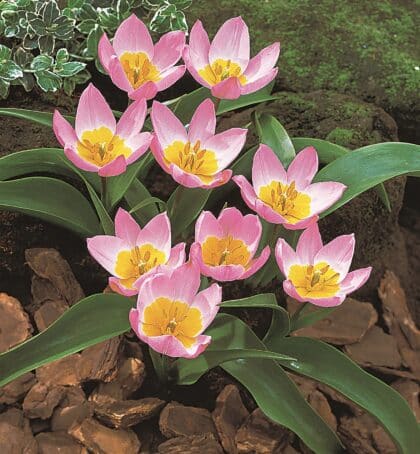
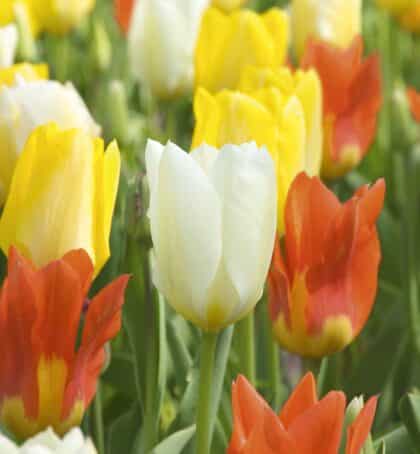
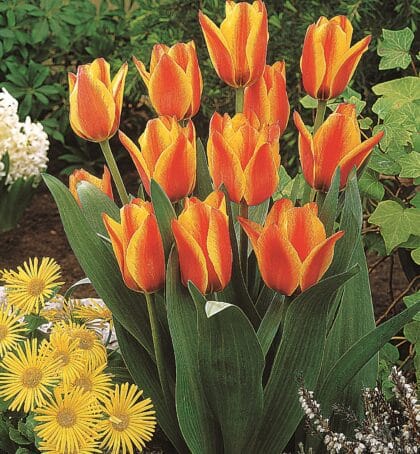
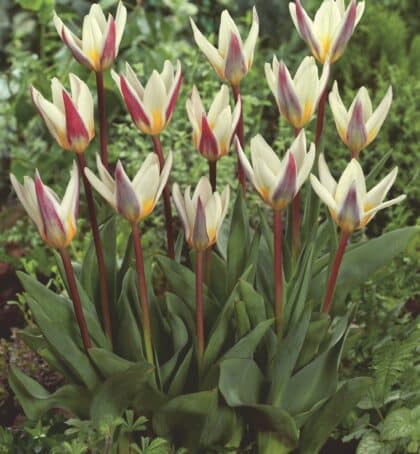
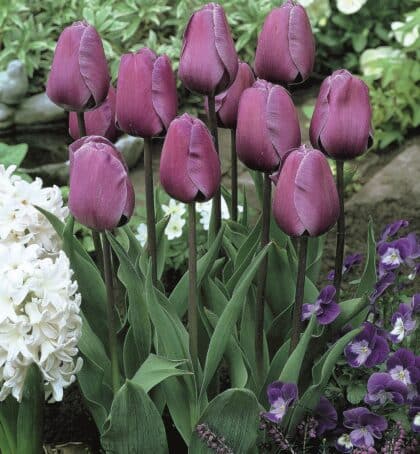
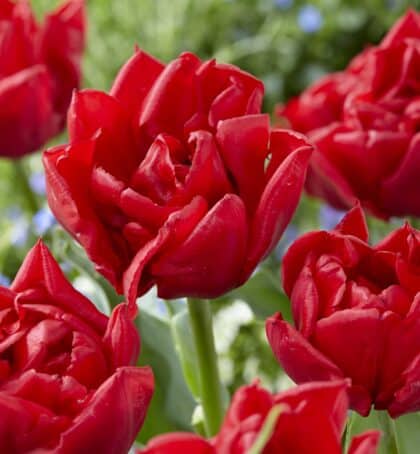
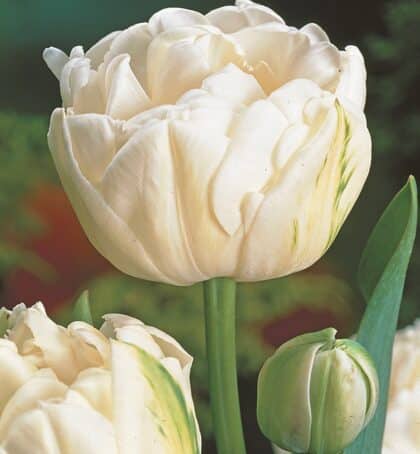
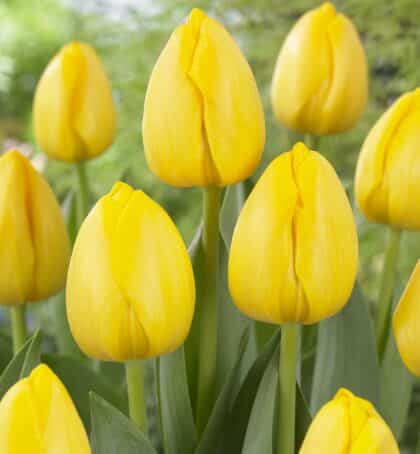
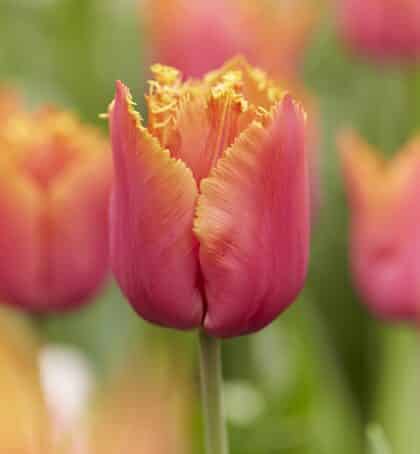
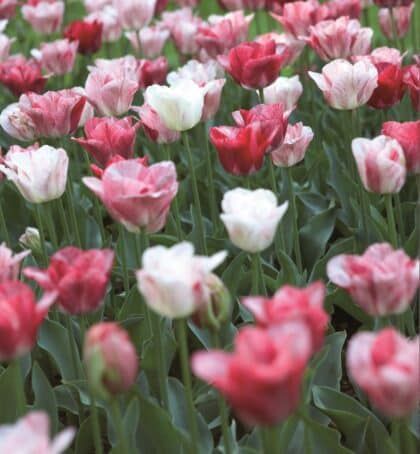
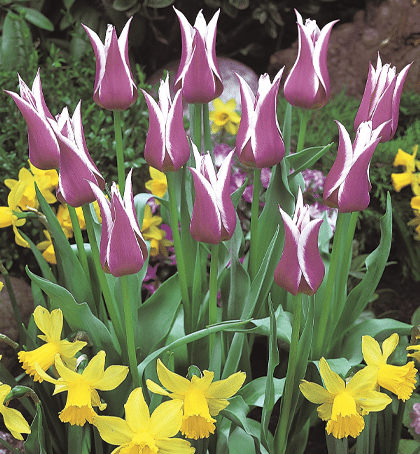
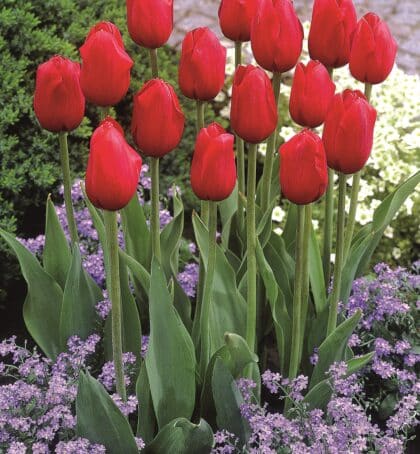
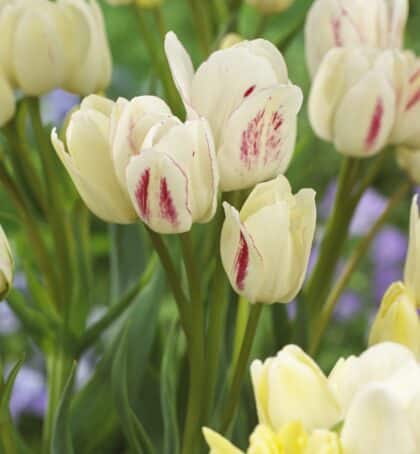
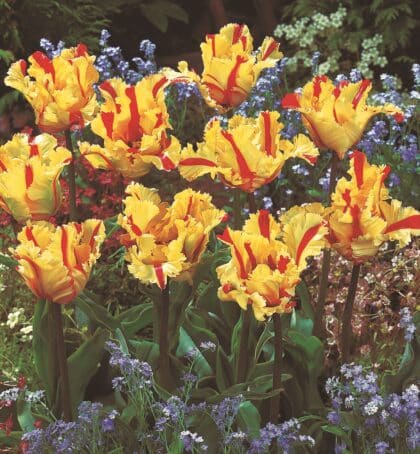
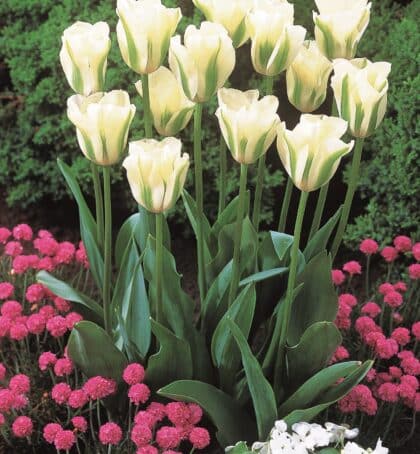
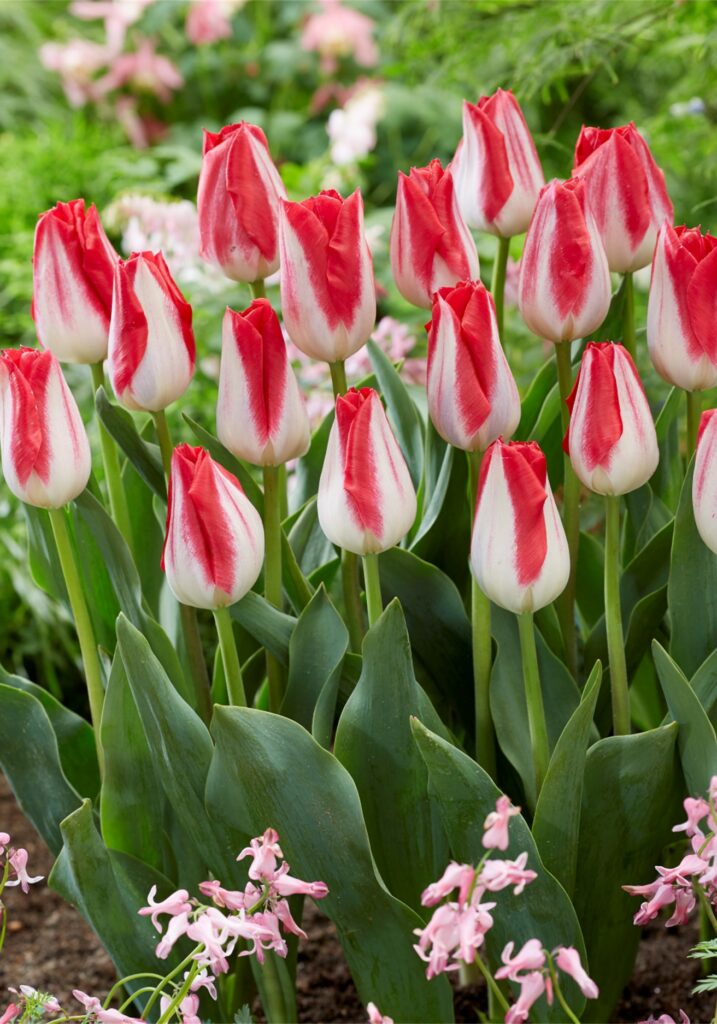
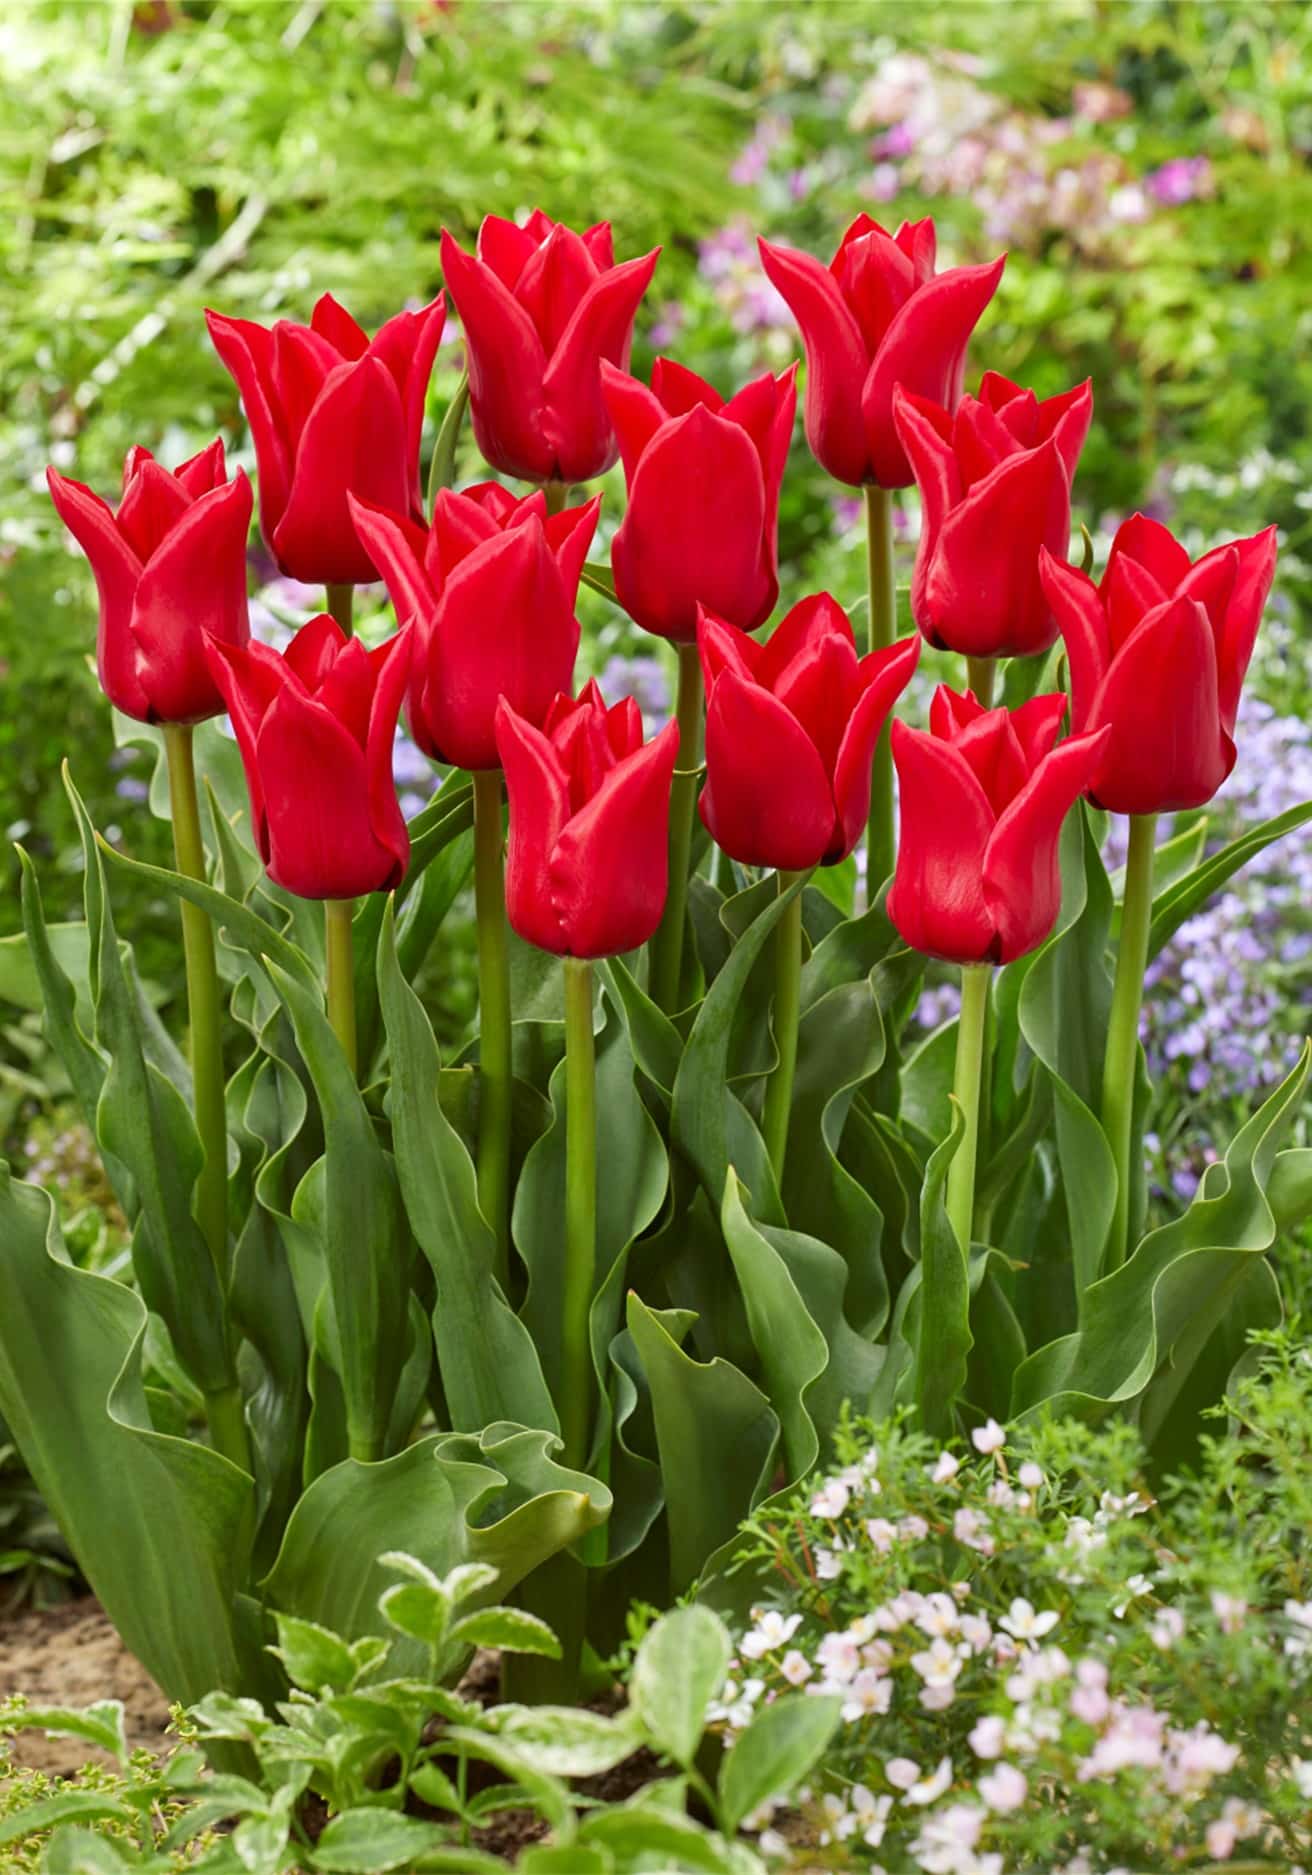
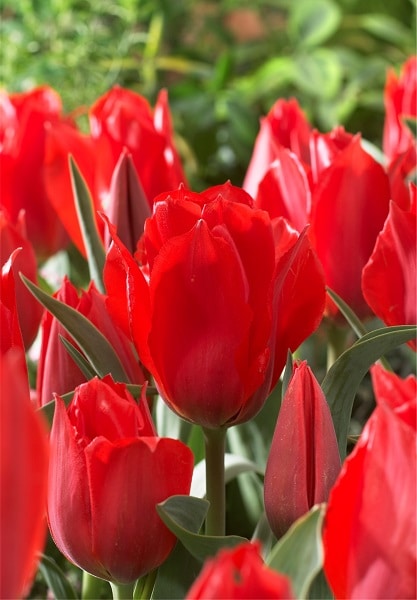
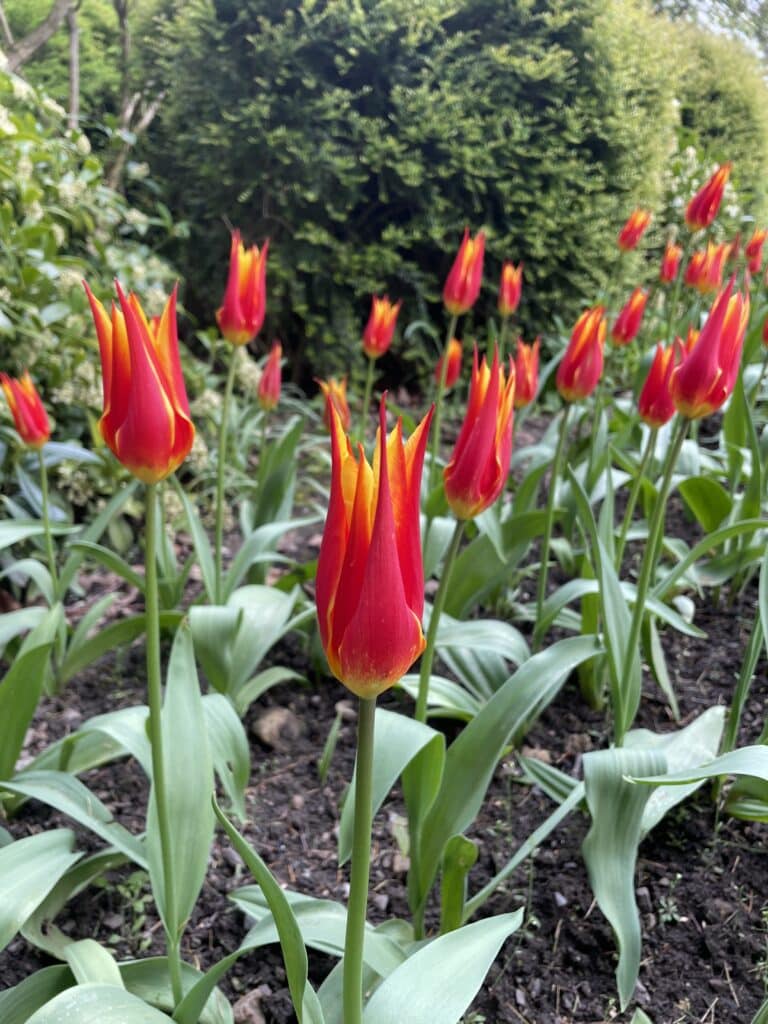
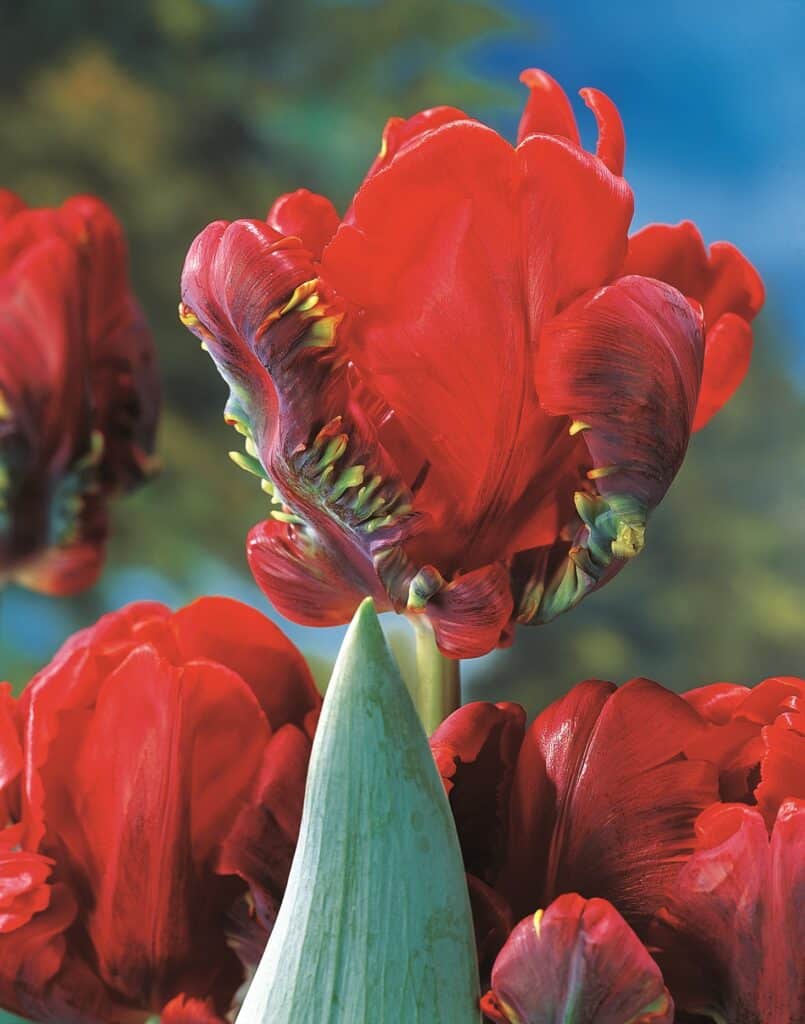
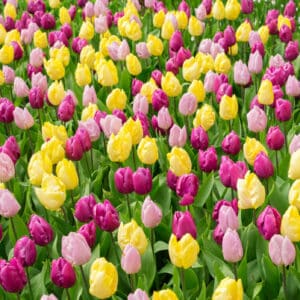
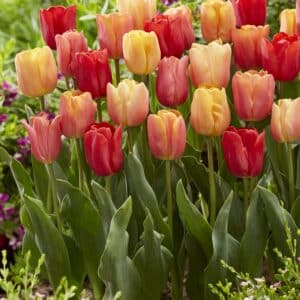
Growing Tulips
How to get the best results from your Tulips
How Tulips Grow
As British gardeners we appreciate that tulips are not native to our shores, or indeed even Holland, but rather Turkey and Asia Minor, with very different climatic and growing conditions than we experience. Tulips grow in drifts on mountain slopes and in valleys, experience cold winters, plenty of water in the spring and dry baked summers.
Tulip bulbs have to be of sufficient size to produce a flower. Everything the tulip needs to flower is contained within the bulb. The larger the bulb the larger the flower, this year’s flower embryo and food stores are already contained within the bulb.
The bulbs do not start making roots until the arrival of cooler autumn temperatures. Well worked oxygenated soil is important to maximise root development which allows the tulip to take on sufficient water when it starts growing in the spring. Once the tulips emerge above ground, unless interrupted by a cold snap, they grow remarkably quickly taking in a tremendous amount of water.
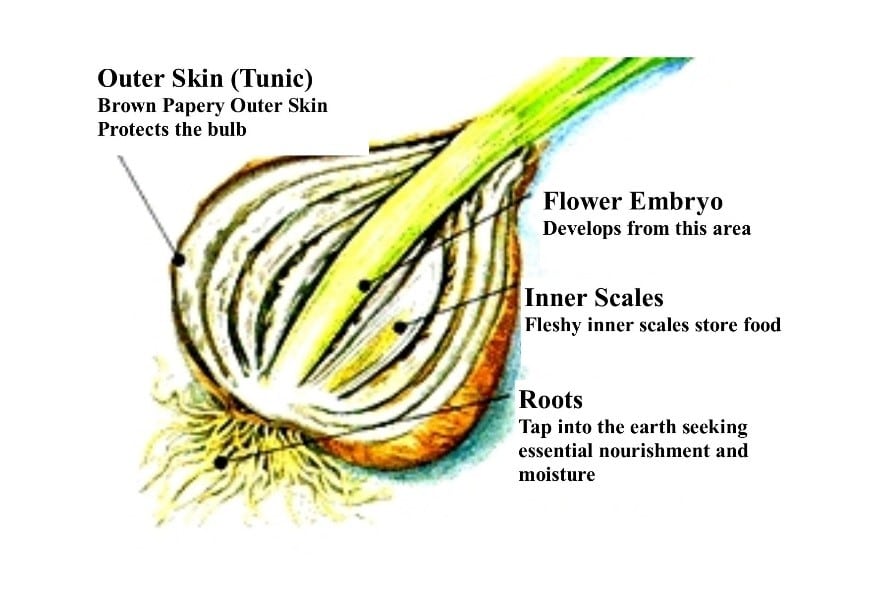
Tulips multiply by producing offsets around the basal (root) plate. The richer the soil the fewer offsets produced. Next year’s bulb essentially grows in place of the parent bulb which is largely spent having used its resources producing this year’s flower.
After flowering the new bulb continues to feed from the root system, taking in moisture and nutrients from the soil. The bulb also absorbs nutrients from the plant itself. The foliage is necessary for photosynthesis, to store energy in the new bulb as carbohydrate for the following year. Bulbs need a warm ambient temperature during July and August to ripen the flower embryo.
Tulip Planting
Tulips can be planted anytime from October onwards, all the way up until Christmas, weather permitting. Take the weeks beforehand to make sure the soil is well dug over in preparation for planting.
Do not plant your tulips too deep. Depending on your soil type plant 10-15cm (4-6inches) deep. If you garden on heavy soil no more than10cm (4inches) is recommended, for lighter well drained soils you can plant up to 15cm (6inches) deep.
Bulbs can be left in year on year, particularly if you have lighter well drained soil. Remember they do need a warm dry location during July and August.
Tulips in Containers
Use a soil-based compost such as John Innes No. 2. It is important to keep the pots evenly moist during both the autumn and spring without soaking them. Many general-purpose composts are difficult to keep evenly moist. Always use fresh compost.
Plant the bulbs with the flat side outwards, especially those around the perimeter, the first and largest leaf will grow from this side producing a more balanced effect. After planting water and keep the pots in a cool sheltered location, protected from mice and other predators. During a dry autumn water as necessary until the onset of winter. Note that pots tend to dry from the outside in, bear this in mind particularly in the spring. A lack of water will lead to stunted shrivelled plants. Move to the patio when the bulbs start to produce growth.
No feeding is required until after flowering, the bulbs come with their own food reserves. Excess nitrogen will lead to tall lanky plants with no benefit to the flower size.

What to do After Flowering
Once the tulip has finished flowering it is important to deadhead the flowers, we do not want any energy wasted in the production of seeds. The plant should then be left to die back naturally. If grown in pots make sure the soil is kept evenly moist. When the foliage starts to yellow the plant has reached the end of its growing season, any disturbance before this will prematurely end the growing of the new bulb.
The bulbs are then effectively semi dormant until the return of cooler temperatures the following autumn. Good drainage is essential as bulbs will not do well standing in cold damp ground.
Bulbs grown in containers can now be lifted and stored somewhere warm and dry, ready for replanting in the autumn.
Lifting Bulbs
When you lift tulips, you will find a new bulb has developed flanking the old flower stem. It’s flattened side results from growing against the flower stem as it develops. There will also be smaller offset bulblets that have grown from dormant buds on the basal plate of the mother bulb. Unless you are going to grow these on for several years they can be discarded.
Once lifted the bulbs should be cleaned of any soil and stored in nets until replanting in the autumn. A garden shed or garage is ideal. Any old petals or plant foliage should be cleared away and under no circumstances composted.